
If you’re a bread lover who enjoys a hearty and rustic bread bowl that’s perfect for holding soups, stews, and dips, then you’re in luck. In this post, I’ll guide you through the process of making a delicious and golden brown sourdough bread bowl that’s sure to impress your friends and family. With easy-to-follow steps and a simple recipe that uses only a handful of ingredients, you’ll be able to create beautifully baked homemade bread bowls that are both flavorful and satisfying.
Making A Sourdough Bread Bowl
Although we now live in Austin, Texas my husband is originally from the Bay Area in California. One of his favorite things to do when we go back to visit is sit on the pier in San Francisco and eat fresh and creamy clam chowder out of sourdough bowls.
San Francisco is known for their delicious sourdough and Boudin’s is the place to go for the best tasting sourdough around. The bakery has been around since 1849 and not only are they famous for their delicious sourdough bread bowl recipe but they hold a special and nostalgic place in my sweet husband’s heart. That’s why I knew I needed to perfect my own version of their perfect sourdough bread bowl to serve with a yummy hot soup.
What Is The Secret To Good Sourdough Bread?
The secret is in using an active starter and making sure you bake the bread in a moist environment. You can do this by using a dutch oven or following this guide to baking sourdough without a dutch oven.
Sourdough bread is made using wild yeasts instead of commercial yeast. These wild yeasts are naturally present in the flour and the air around us. To make sourdough bread, you’ll need an active sourdough starter. If you don’t have one, you can follow this step-by-step guide to creating your own sourdough starter.
How To Make Homemade Sourdough Bread Bowls
For this recipe you’ll need:
- 5 cups of all-purpose flour
- 1.5 cups of water
- 1 cup of active sourdough starter
- 1 tablespoon of sugar
- 2 teaspoons of salt (I use redmonds real salt)
For this simple sourdough recipe you can use bread flour or even whole wheat flour for this recipe, but all-purpose flour works just fine.
It is also important to have a healthy and bubbly sourdough starter. You can use this sourdough starter recipe to make your own.
To begin, mix the flour, sugar, and salt in a large bowl. Add the active starter and water, and use a wooden spoon or a dough hook attachment on a stand mixer to mix everything together until a wet dough forms. Personally, I prefer to use a wooden spoon to start mixing and once the dough has started to come together I start using my hands.
Preparing Your Dough
Wet your clean hands with warm water, and knead the dough on a lightly floured work surface for 15-20 minutes, until you have a smooth dough. The amount of time that you need to kneed the dough can vary based on several different factors. You want your bread dough to be smooth, elastic, and to pass the window pane test.
Once the dough is smooth and elastic, transfer it back to the large mixing bowl, cover it with plastic wrap or a damp tea towel, and let it rest for an hour in a warm place. After an hour, perform a stretch and fold. Wet your hands again, and gently stretch the dough out and fold it over onto itself, rotating the bowl each time you fold. This helps redistribute the yeast and gases in the dough and also helps develop the gluten.
Allow the dough to rest in the bowl for at least one hour but up to four hours for bulk fermentation. If you want to let your dough bulk ferment for longer than an hour it is a great idea to perform additional stretch and folds every hour.

Shaping Your Sourdough Bread Bowl
After the bulk fermentation, transfer the dough to your floured surface using a bench scraper, divide the dough into two equal pieces, and shape each half into a round ball. Place the dough into a proofing basket or a batton basket lined with a tea towel that has been dusted with flour. If you do not have a batton basket then a small bowl lined with a tea towel will work just fine. Cover the basket with plastic wrap, and place it in the fridge overnight.
The next morning, preheat your oven to 500 degrees Fahrenheit. Place a 5-quart Dutch oven in the oven to preheat as well. If you are baking both loaves of sourdough at the same time you can use two dutch ovens together. If you only have one dutch oven you can also bake the bread in batches. It is possible to bake the soup bowls on a baking sheet or baking stone. To do that you will want to follow this method of making sourdough bread without a dutch oven.
Remove the dough from the fridge and place a piece of parchment paper over the top of the dough. Flip the dough and parchment paper over, and gently place the dough balls into the hot Dutch oven. Score the top of the dough with a razor blade to allow for oven spring, and cover the Dutch oven with the lid.
Bake the bread at 500 degrees Fahrenheit for 20 minutes. After 20 minutes, lower the oven temperature to 450 degrees Fahrenheit and bake for an additional 20 minutes. Remove the lid from the Dutch oven, and bake for an additional 10 minutes to allow for a crispy crust.
How Do Bread Bowls Not Get Soggy?
The traditional crispy crust on a loaf of sourdough bread is what gives the bowl the structural integrity that it needs in order to function as a bowl and not get soggy. This is why it is very important to bake your sourdough bread bowl in a moist environment to achieve that nice thick and crispy crust.
A dutch oven creates a perfect environment for baking sourdough but if you do not have a dutch oven you can use this method to get the same crispy and delicious results.
t is also best to serve thicker soups when you are using a bread bowl. I find that a creamy soup is the best choice. A soup that is more like broth, such as tomato soup, will soak into the bread more quickly and result in a soggy mess.
Also, keep in mind that the longer your soup sits in the bread bowl the more soggy the bread will become. Because of this I like to serve the soup very soon after I have ladled it into the bread bowl.
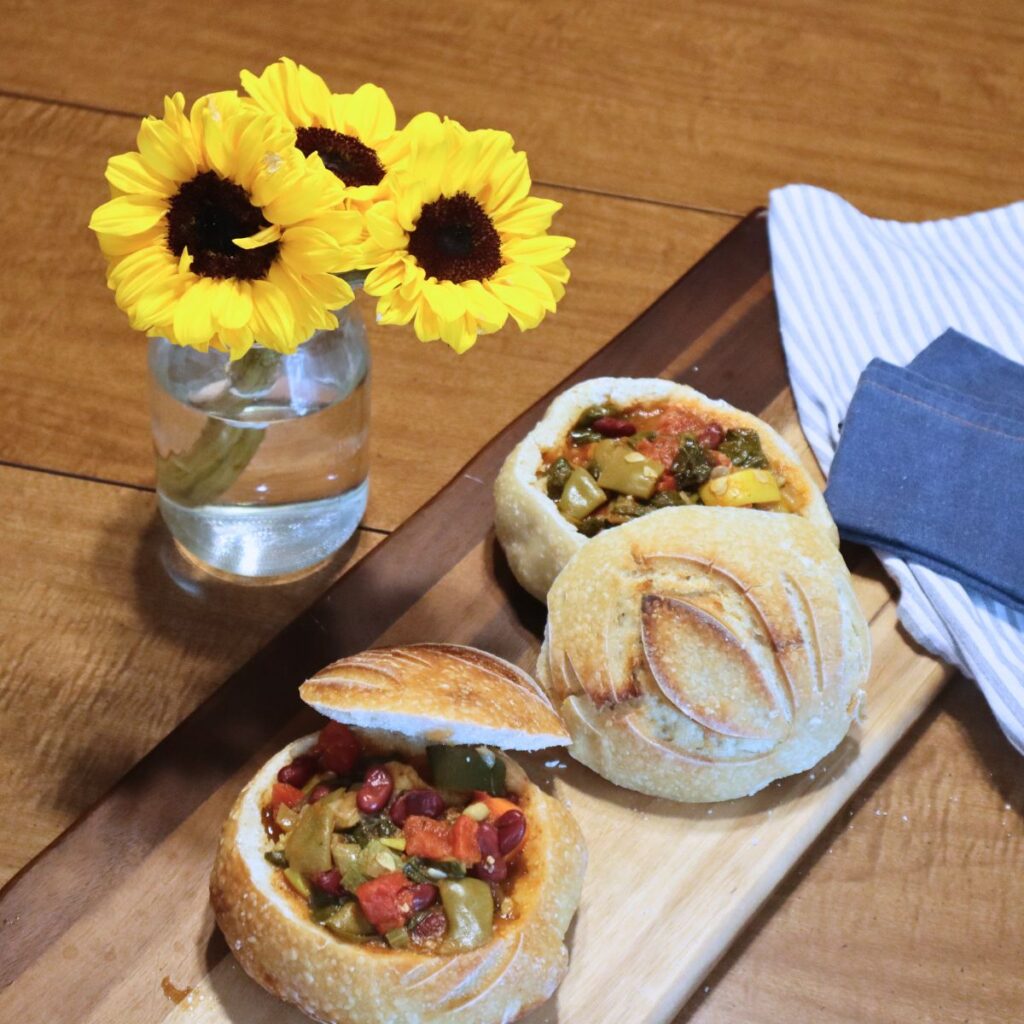
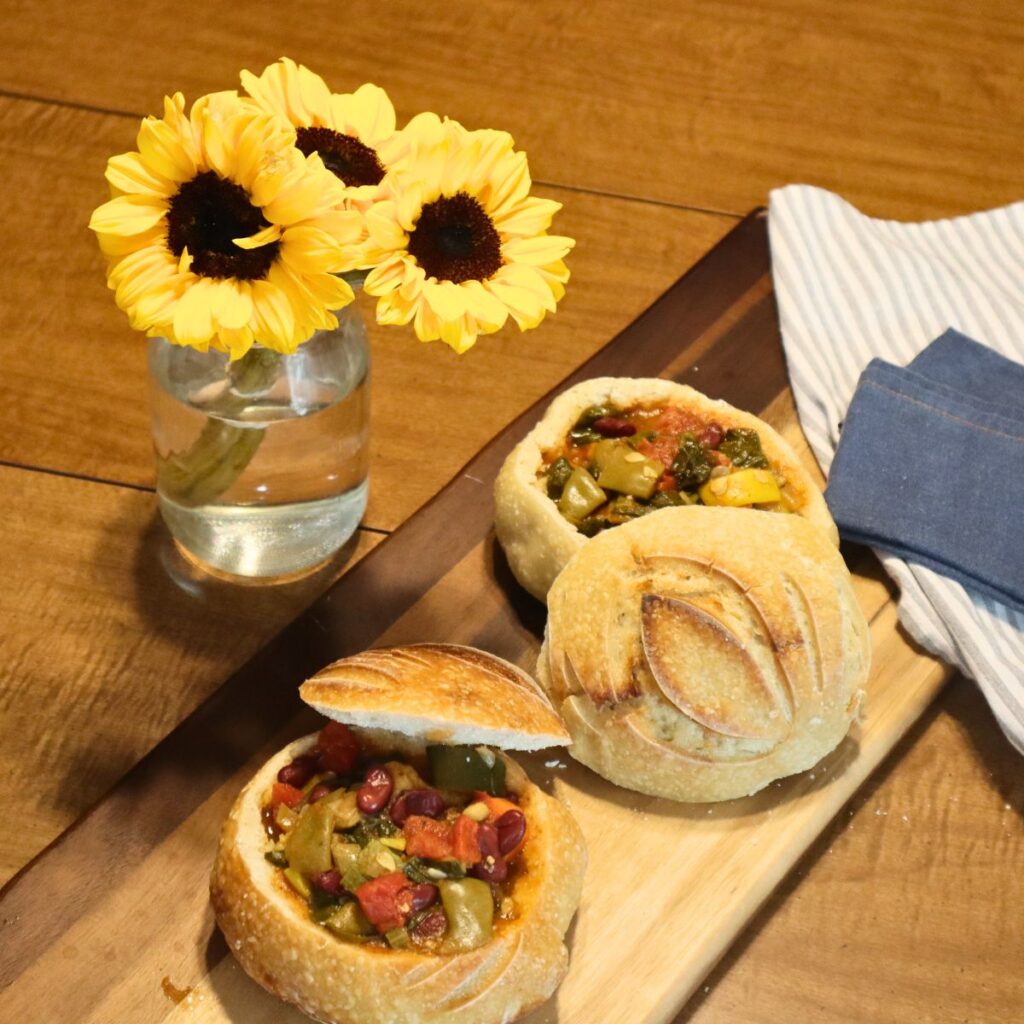
Creating Your Sourdough Bread Bowl
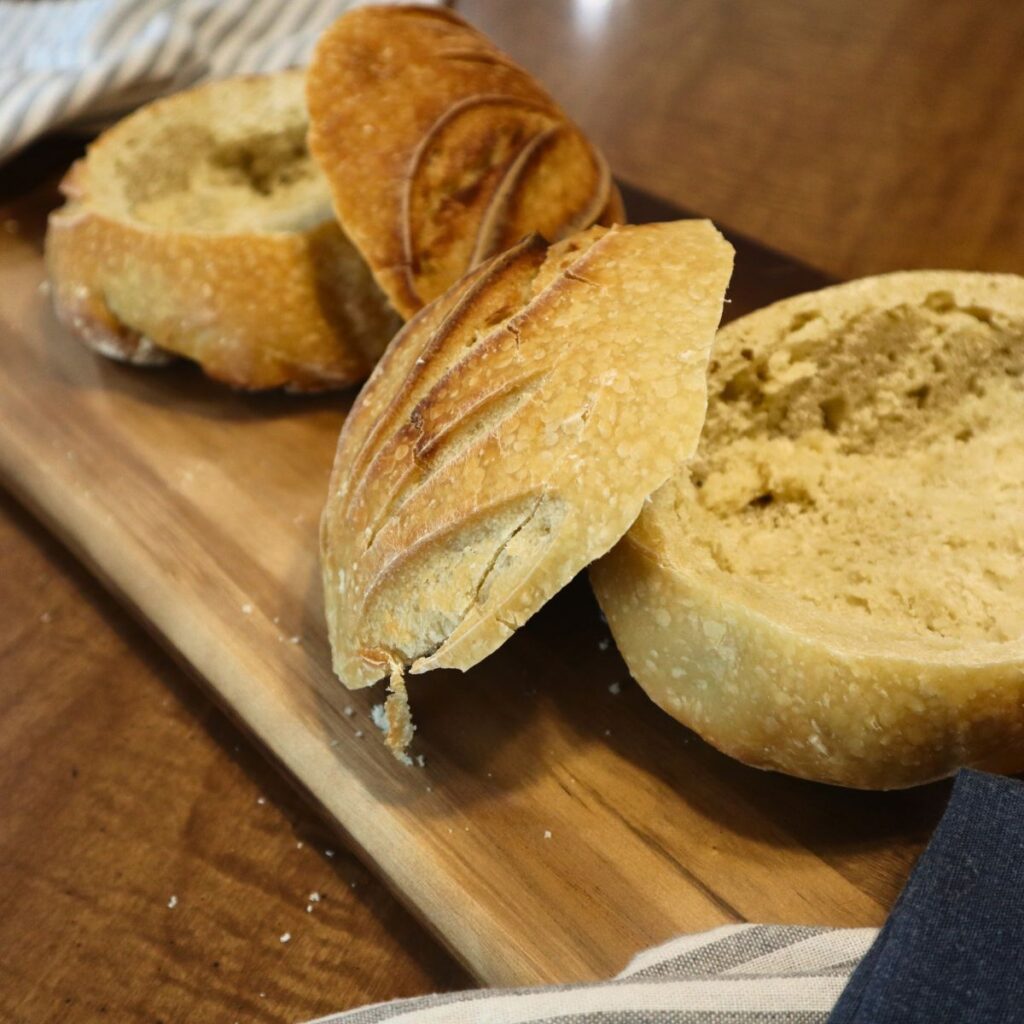
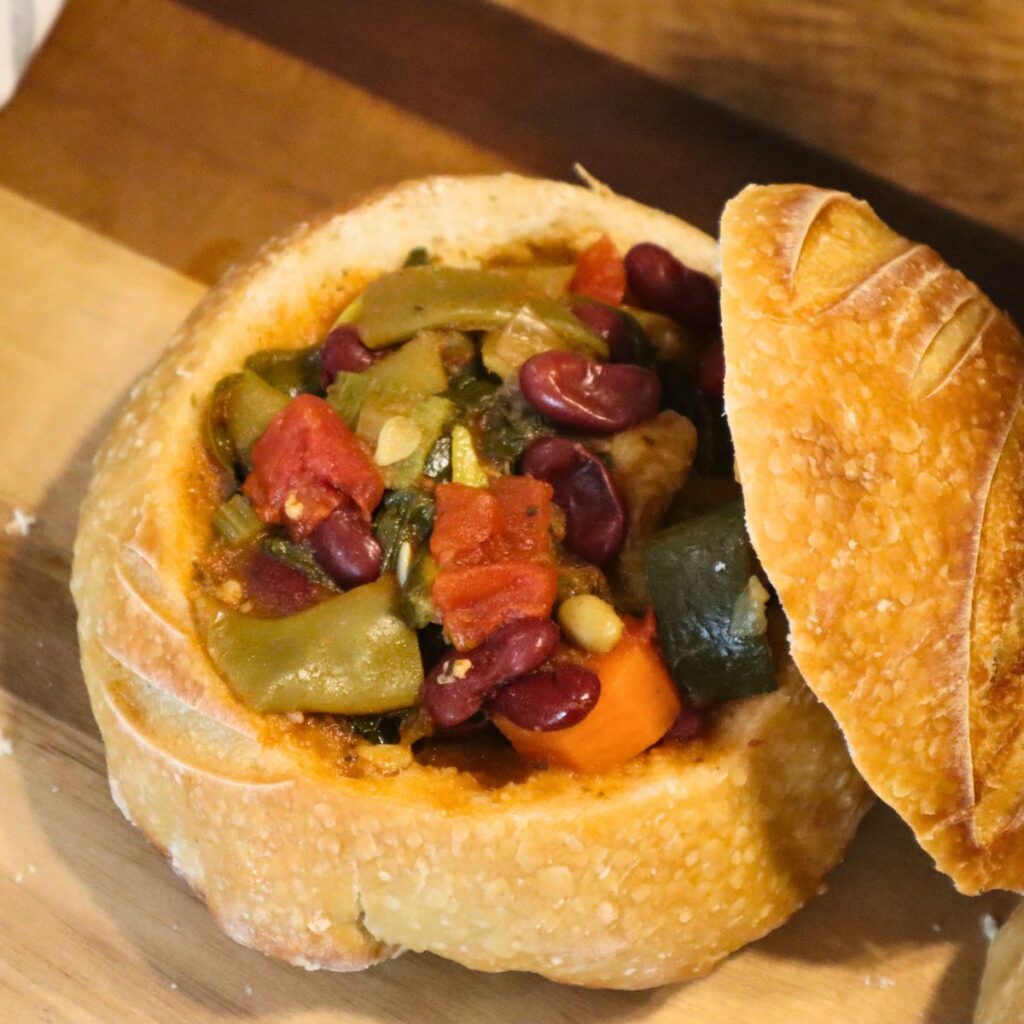
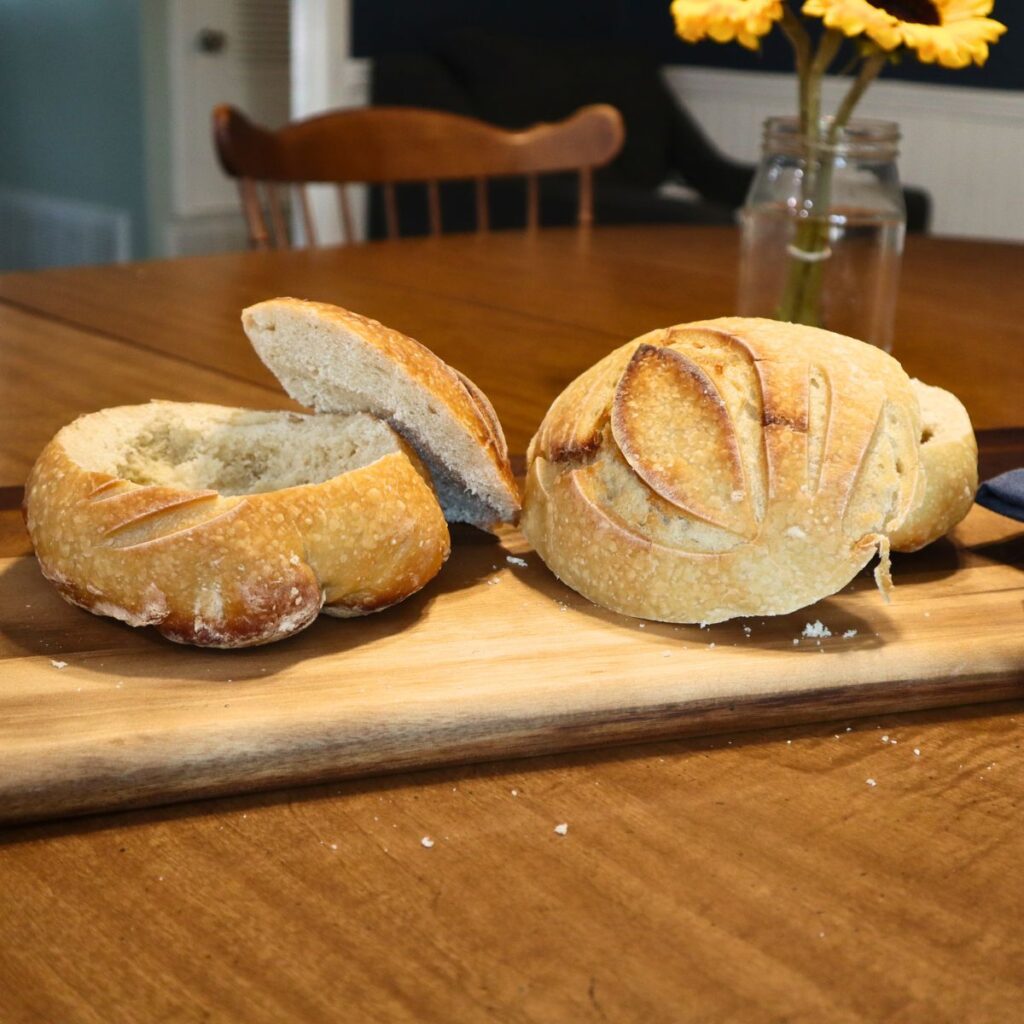
Once your loaves of bread have cooled completely use a sharp knife, a serrated knife works best, to cut off the top of the bread bowl. I approach this in the same way that I would remove the top of a pumpkin that I want to carve. I cut into the bread at an angle.
Next, scoop out the inside of your loaf in order to create the cavity for the bowl where your soup will be ladled in. It is up to you how much of the insides you want to remove but I do recommend that you do not remove all of the bread leaving only the crust. This will weaken the structure of the bowl and cause it to get soggy more quickly or possibly leak out some of your soup.
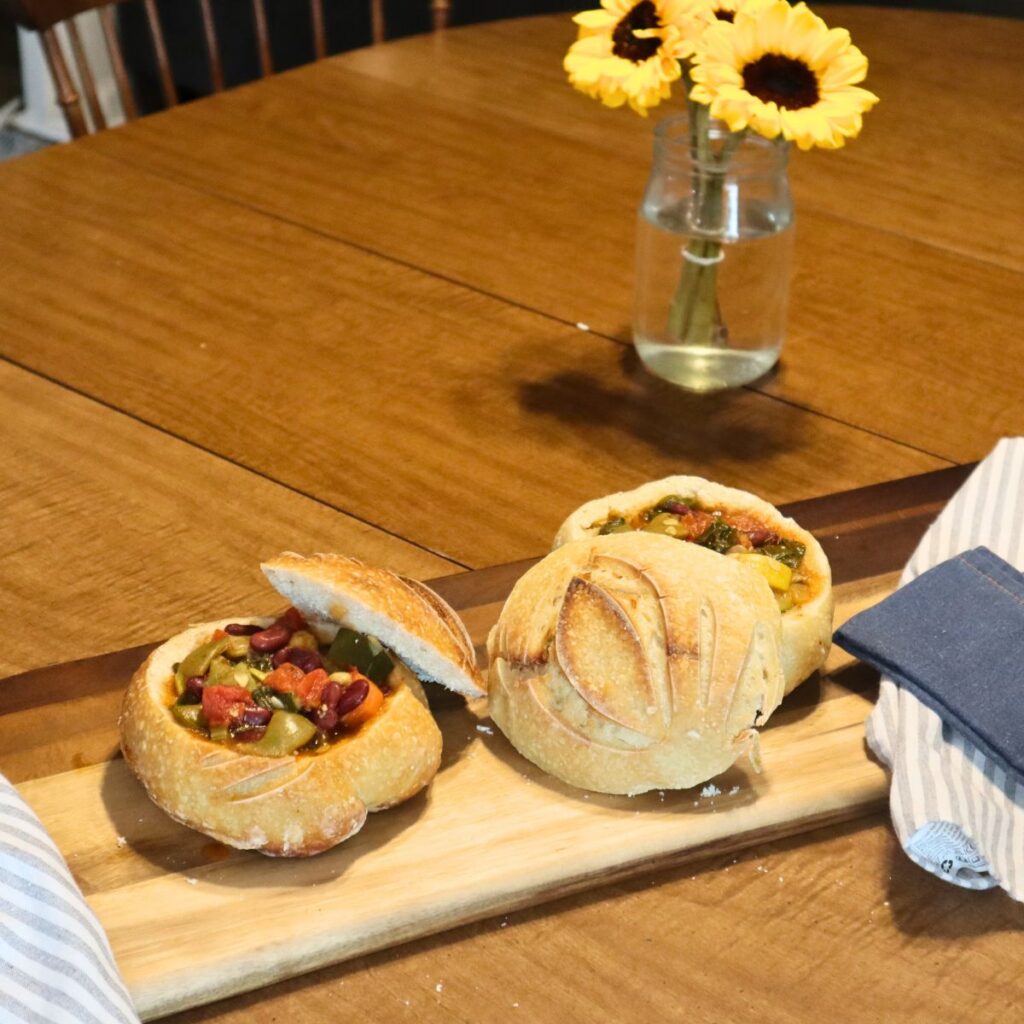
Enjoy Your Delicious Comfort Food
Finally, ladle some of your favorite soup into the bread bowl and dig in.
While I have not mastered my husband’s beloved clam chowder yet we do still enjoy using bread bowls for other soups like minestrone or a nice beef stew.
Sourdough Bread Bowl Recipe
Honestly, there’s nothing quite like the aroma of freshly baked bread wafting through your home, and making your own sourdough bread bowl using the traditional sourdough method is an experience like no other. If you’re new to the world of homemade breads, this is the perfect recipe to try for the first time.
One of the wonderful things about making true sourdough bread is the satisfaction that comes with taking part in a time-honored tradition. With this recipe, you’ll be using the same traditional method that has been passed down for generations, and once you taste the results, you’ll understand why it’s such a beloved practice. But be warned – this delicious bread has a way of becoming a terrible addiction! So, grab the recipe card and get ready to embark on a journey of bread-making bliss.
Sourdough Bread Bowl

Delicious and easy to make sourdough bread bowl recipe.
Ingredients
- 5 cups of all-purpose flour
- 1.5 cups of water
- 1 cup of active sourdough starter
- 1 tablespoon of sugar
- 2 teaspoons of salt
Instructions
1. Mix the flour, sugar, and salt in a large mixing bowl
2. Add the active starter and water, and use a wooden spoon to mix everything together until a wet dough forms
3. Wet your hands with warm water, and knead the dough on a lightly floured work surface for 15-20 minutes, until it becomes smooth and elastic
4. Once the dough is smooth and elastic, transfer it back to the large mixing bowl, cover it with plastic wrap or a damp tea towel, and let it rest for an hour at room temperature.
5. After an hour, perform a stretch and fold. Wet your hands again, and gently stretch the dough out and fold it over onto itself, rotating the bowl each time you fold.
6. Allow the dough to rest in the bowl for at least one hour but up to four hours for bulk fermentation. If you want to let your dough bulk ferment for longer than an hour you will need to perform additional stretch and folds every hour.
7. Transfer the dough to your floured surface using a bench scraper, divide the dough in half, and shape each half into a round ball. Place the dough into a proofing basket or a batton basket lined with a tea towel that has been dusted with flour Cover the basket with plastic wrap, and place it in the fridge overnight.
8. The next morning, preheat your oven to 500 degrees Fahrenheit. Place a 5-quart Dutch oven in the oven to preheat as well. If you are baking both loaves of sourdough at the same time you can use two dutch ovens together. If you only have one dutch oven you can also bake the bread in batches.
9. Remove the dough from the fridge and place a piece of parchment paper over the top of the dough. Flip the dough and parchment paper over, and gently place the dough into the hot Dutch oven. Score the top of the dough with a razor blade to allow for oven spring, and cover the Dutch oven with the lid.
10. Bake the bread at 500 degrees Fahrenheit for 20 minutes. After 20 minutes, lower the oven temperature to 450 degrees Fahrenheit and bake for an additional 20 minutes. Remove the lid from the Dutch oven, and bake for an additional 10 minutes to allow for a crispy crust.
11. Once the bread is done baking, remove it from the Dutch oven and place it on a wire rack to cool. Check the internal temperature of the bread with a digital thermometer to ensure it has reached 200-210 degrees Fahrenheit. Allow the bread to cool completely before slicing into it.
Making The Bread Bowl
1. Once the bread has cooled cut off the top of the bread and scoop out the insides to make a bowl.
2. Ladle in your soup or stew.
3. Enjoy
Notes
A good indicator that the dough is properly kneaded is when it passes the windowpane test, where a small piece of dough can be stretched thin enough to see light through it without tearing. Additionally, the dough should feel smooth and elastic, and not stick to your hands or the work surface.

Leave a Reply